Guide
A hands-on tour of Eido — from first shapes to generative art.
Drawing
Everything in Eido starts with shapes. You describe what something looks like — not how to draw it. There's no canvas, no drawing loop, no mutable state. Just data that says "here's a circle at this position with this color." Eido reads that description and produces the image.
Shapes
You describe a shape as a map — a collection of key-value pairs that says what the shape is, where it goes, and how it looks:
Rectangle
{:node/type :shape/rect
 :rect/xy [50 50]          ;; top-left corner position
 :rect/size [200 100]      ;; width and height
 :style/fill [:color/name "dodgerblue"]}
Add rounded corners with :rect/corner-radius:
{:node/type :shape/rect
 :rect/xy [50 50]
 :rect/size [200 100]
 :rect/corner-radius 16
 :style/fill [:color/name "dodgerblue"]}
Circle
{:node/type :shape/circle
 :circle/center [200 200]  ;; center point
 :circle/radius 80         ;; radius in pixels
 :style/stroke {:color [:color/name "black"] :width 2}}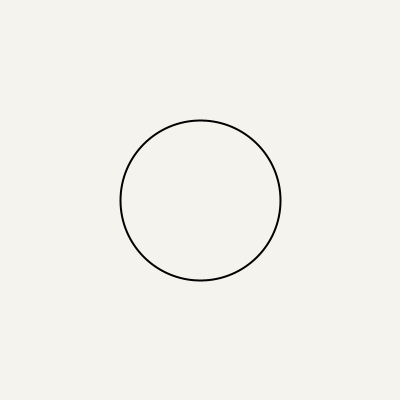
Ellipse
{:node/type :shape/ellipse
 :ellipse/center [200 200]
 :ellipse/rx 120            ;; horizontal radius
 :ellipse/ry 60             ;; vertical radius
 :style/fill [:color/name "indianred"]}
Arc
A partial ellipse — like a pie slice or an open curve:
{:node/type :shape/arc
 :arc/center [200 200]
 :arc/rx 80 :arc/ry 80
 :arc/start 0 :arc/extent 270   ;; degrees
 :arc/mode :pie                  ;; :open, :chord, or :pie
 :style/fill [:color/name "gold"]}
Line
{:node/type :shape/line
 :line/from [50 50]
 :line/to [350 250]
 :style/stroke {:color [:color/name "black"] :width 2}}
Path
For anything that isn't a basic shape, use a path. Paths are sequences of drawing commands — move to a point, draw a line, draw a curve, and close the shape:
{:node/type :shape/path
 :path/commands [[:move-to [100 200]]          ;; pick up the pen
                 [:line-to [200 50]]           ;; draw a straight line
                 [:curve-to [250 0] [300 100]  ;; cubic bezier curve
                            [300 200]]         ;;   (two control points + end)
                 [:quad-to [250 250]           ;; quadratic bezier curve
                           [200 200]]          ;;   (one control point + end)
                 [:close]]                     ;; connect back to start
 :style/fill [:color/name "gold"]}
Convenience helpers
The eido.scene namespace provides shortcuts for common shapes:
(require '[eido.scene :as scene])

(scene/regular-polygon [200 200] 80 6)    ;; hexagon
(scene/star [200 200] 80 35 5)            ;; 5-pointed star
(scene/triangle [100 200] [200 50] [300 200])
(scene/smooth-path [[50 200] [150 50] [250 200] [350 50]])  ;; smooth curve through points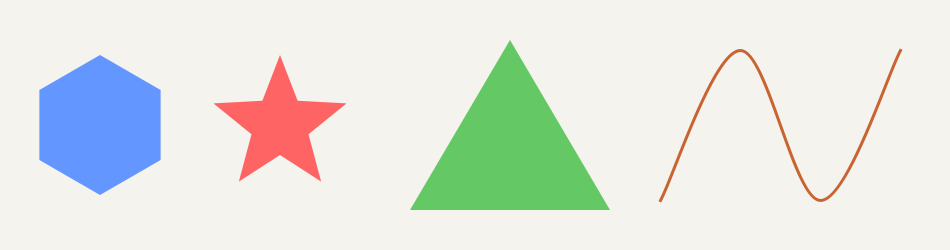
Text
Text in Eido is not rasterized pixels — it's converted to vector paths, just like any other shape. That means text works with everything: gradient fills, strokes, transforms, clipping, even 3D extrusion.
Simple text
{:node/type   :shape/text
 :text/content "Hello"
 :text/font    {:font/family "Serif" :font/size 48 :font/weight :bold}
 :text/origin  [50 100]       ;; baseline-left anchor
 :text/align   :center        ;; :left (default), :center, :right
 :style/fill   [:color/name "black"]}
Per-glyph control
Style each character independently — great for rainbow text, animated reveals, or creative typography:
{:node/type    :shape/text-glyphs
 :text/content "COLOR"
 :text/font    {:font/family "SansSerif" :font/size 64}
 :text/origin  [50 100]
 :text/glyphs  [{:glyph/index 0 :style/fill [:color/name "red"]}
                {:glyph/index 1 :style/fill [:color/name "limegreen"]}]
 :style/fill   [:color/name "gray"]}  ;; default for unlisted glyphs
Text on a path
Make text follow any curve:
{:node/type    :shape/text-on-path
 :text/content "ALONG A CURVE"
 :text/font    {:font/family "SansSerif" :font/size 24}
 :text/path    [[:move-to [50 200]]
                [:curve-to [150 50] [350 50] [450 200]]]
 :text/offset  10             ;; start distance along path
 :text/spacing 1              ;; extra inter-glyph spacing
 :style/fill   [:color/name "black"]}
Fonts reference system fonts by name. Java's built-in fonts — "Serif", "SansSerif", "Monospaced" — work on every system.
Styling
Shapes on their own are just geometry. Styling is what makes them visible — fills, strokes, gradients, and textures. Eido gives you a wide range of options, from flat colors to procedural hatching, all specified as data in the same shape map.
Colors
Eido understands several color formats. Use whichever feels natural — they all work everywhere:
[:color/name "coral"]         ;; 148 CSS named colors
[:color/rgb 255 127 80]       ;; red, green, blue (0-255)
[:color/rgba 255 127 80 0.5]  ;; with transparency (0-1)
[:color/hsl 16 1.0 0.66]     ;; hue, saturation, lightness
[:color/hex "#FF7F50"]       ;; hex notation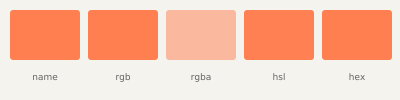
All five lines above describe the same color — coral. Use whichever format suits your workflow.
Color manipulation
Adjust colors programmatically — lighten, darken, blend, or shift the hue:
(require '[eido.color :as color])

(color/lighten    [:color/name "red"] 0.2) ;; lighter
(color/darken     [:color/name "red"] 0.2) ;; darker
(color/saturate   [:color/name "red"] 0.3) ;; more vivid
(color/rotate-hue [:color/name "red"] 120) ;; shift hue
(color/lerp color-a color-b 0.5)             ;; blend 50/50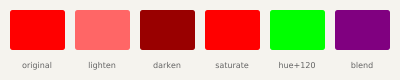
Perceptually uniform color (OKLAB / OKLCH)
RGB and HSL are device-oriented — equal numerical steps don't produce equal visual steps. OKLAB and OKLCH are perceptually uniform: interpolation stays vivid instead of passing through muddy grays.
[:color/oklab 0.63 0.22 0.13]  ;; L (lightness), a, b
[:color/oklch 0.63 0.26 29]   ;; L, C (chroma), h (hue degrees)

;; Convenience constructors:
(color/oklab 0.63 0.22 0.13)
(color/oklch 0.7 0.15 200)
The real power is in OKLAB interpolation — blending red and cyan in RGB produces gray, but in OKLAB the midpoint stays chromatic:
;; RGB interpolation (passes through gray):
(color/lerp :red :cyan 0.5)

;; OKLAB interpolation (stays vivid):
(color/lerp :red :cyan 0.5 {:space :oklab})

;; Convenience shorthand:
(color/lerp-oklab :red :cyan 0.5)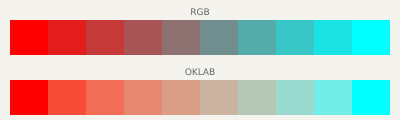
Use rgb->oklab and rgb->oklch to inspect any color in perceptual coordinates:
(color/rgb->oklab 255 0 0)   ;; => [0.628 0.225 0.126]
(color/rgb->oklch 255 0 0)   ;; => [0.628 0.258 29.2]
Color contrast and distance
Check whether two colors have enough visual separation — for readability and accessibility:
;; WCAG luminance contrast ratio (1 = identical, 21 = max)
(color/contrast :black :white)        ;; => 21.0
(color/contrast :red :darkred)        ;; => ~2.1

;; Perceptual distance in OKLAB space
(color/perceptual-distance :red :blue)  ;; => ~0.52

;; Minimum contrast in a palette (all pairs)
(palette/min-contrast [:red :coral :gold :navy])

;; Sort palette from dark to light (perceptual lightness)
(palette/sort-by-lightness my-palette)
Extracting palettes from images
Photograph a landscape, scan a painting, or screenshot a reference — then extract its dominant colors as a palette:
(require '[eido.color.palette :as palette])

;; Extract 5 dominant colors from a photograph:
(palette/from-image "photo.jpg" 5 {:seed 42})

;; Preview the result:
(show (palette/swatch (palette/from-image "sunset.jpg" 6)))
Uses k-means clustering in OKLAB perceptual color space — colors that look similar get grouped together. Result is sorted dark to light.
Strokes
Strokes are the outlines around shapes. You can control the width, the shape of line endings (caps), and add dashed patterns:
;; Thick rounded caps (top left) vs. butt caps (top right)
{:style/stroke {:color [:color/name "black"]
                :width 6
                :cap :round}}    ;; :butt, :round, or :square

;; Dashed lines in different patterns
{:style/stroke {:color [:color/name "royalblue"]
                :width 3
                :dash [15 8]}}   ;; alternating dash and gap lengths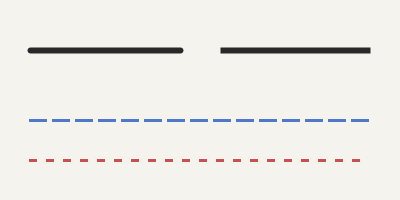
A shape can have both a fill and a stroke — the stroke is drawn on top.
Gradients
Instead of a flat color, fill a shape with a smooth color transition. Eido supports two kinds:
Linear gradient
Colors transition along a line from one point to another:
{:style/fill {:gradient/type :linear
               :gradient/from [0 0]       ;; start point
               :gradient/to [200 0]       ;; end point
               :gradient/stops [[0.0 [:color/rgb 255 0 0]]    ;; red at start
                                [1.0 [:color/rgb 0 0 255]]]}}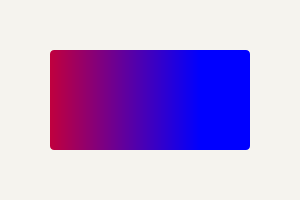
Radial gradient
Colors radiate outward from a center point:
{:style/fill {:gradient/type :radial
               :gradient/center [100 100]
               :gradient/radius 100
               :gradient/stops [[0.0 [:color/name "white"]]
                                [1.0 [:color/name "black"]]]}}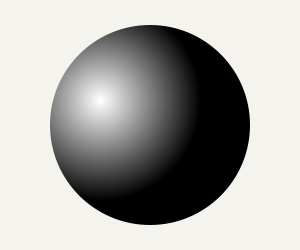
Add as many color stops as you want for multi-color transitions. Any color format works in stops.
Pattern Fills
Beyond solid colors and gradients, Eido supports texture-like fills that give shapes a hand-crafted look:
Hatching
Parallel lines drawn across a shape — like pen-and-ink cross-hatching:
{:style/fill {:fill/type :hatch
               :hatch/angle 45            ;; line angle in degrees
               :hatch/spacing 4           ;; distance between lines
               :hatch/stroke-width 1
               :hatch/color [:color/rgb 0 0 0]}}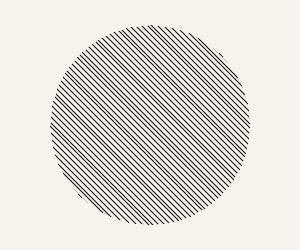
Stippling
Random dots packed inside a shape — like pointillism:
{:style/fill {:fill/type :stipple
               :stipple/density 0.6       ;; how packed (0-1)
               :stipple/radius 1.0        ;; dot size
               :stipple/seed 42           ;; for reproducibility
               :stipple/color [:color/rgb 0 0 0]}}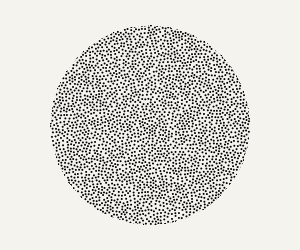
Custom tile patterns
Tile any collection of shapes as a repeating pattern:
{:style/fill {:fill/type :pattern
               :pattern/size [20 20]      ;; tile size
               :pattern/nodes [...]}}
Composition
Once you have shapes, you'll want to combine them — layer them, group them, clip one inside another, or transform them as a unit. Composition tools let you build complex images from simple pieces without losing control.
Groups
Groups let you treat multiple shapes as one unit. Any style, transform, or effect applied to the group affects all its children. Styles inherit — children get the group's fill color unless they specify their own. Opacity multiplies through the tree.
{:node/type :group
 :node/transform [[:transform/translate 200 200]]
 :style/fill [:color/name "red"]
 :node/opacity 0.8
 :group/children
 [{:node/type :shape/circle        ;; inherits red fill
   :circle/center [0 0]
   :circle/radius 80}
  {:node/type :shape/rect
   :rect/xy [-30 -30]
   :rect/size [60 60]
   :style/fill [:color/name "blue"]  ;; overrides with blue
   :node/opacity 0.5}]}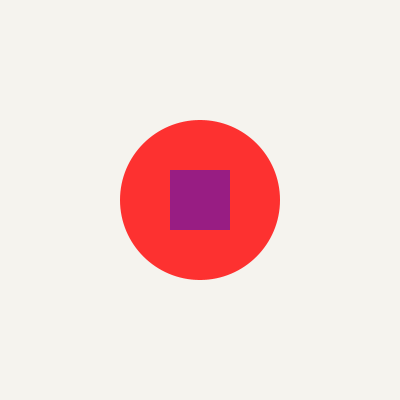
Clipping
Clipping restricts a group's visible area to a shape — like looking through a circular window. Here, three overlapping colored rectangles are clipped to a circle:
{:node/type :group
 :group/clip {:node/type :shape/circle
              :circle/center [150 150]
              :circle/radius 100}
 :group/children
 [{:node/type :shape/rect
   :rect/xy [50 50] :rect/size [100 200]
   :style/fill [:color/name "red"]}
  {:node/type :shape/rect
   :rect/xy [150 50] :rect/size [100 200]
   :style/fill [:color/name "royalblue"]}
  {:node/type :shape/rect
   :rect/xy [50 50] :rect/size [200 100]
   :style/fill [:color/rgba 255 220 0 0.5]}]}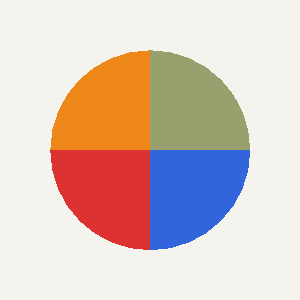
Compositing
Control how overlapping shapes blend together. Opacity makes shapes see-through, and blend modes combine colors in different ways — like layer modes in Photoshop:
;; Two overlapping circles — the blue one is 60% transparent
{:node/type :shape/circle
 :circle/center [110 100] :circle/radius 70
 :style/fill [:color/name "red"]}
{:node/type :shape/circle
 :circle/center [190 100] :circle/radius 70
 :style/fill [:color/name "royalblue"]
 :node/opacity 0.6}
Available blend modes: :src-over (default), :multiply, :screen, :overlay, and more.
Margin control
Clip all artwork to an inset rectangle — a clean way to enforce margins:
(require '[eido.scene :as scene])

;; 30px margin on all sides:
(scene/with-margin my-scene 30)
Uses existing :group/clip infrastructure — wraps all nodes in a clipped group. Works with any content.
Transforms
Move, rotate, scale, and skew any shape or group. Here, five squares are translated to different positions and progressively rotated:
;; Each square is translated and rotated a bit more than the last
{:node/transform [[:transform/translate 100 80]
                  [:transform/rotate 0.3]]}     ;; angle in radians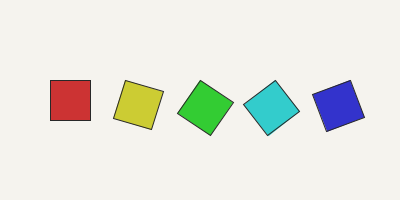
Transforms compose through the tree — a shape inside a translated group inherits the group's transform, then applies its own on top.
Generative
This is where Eido really shines for artists. Instead of placing every shape by hand, you describe rules and parameters — and the system generates complex, organic compositions from them. Every generative tool is deterministic: give it the same seed number and you get the exact same output, every time. Change the seed and you get a fresh variation. This is how artists create long-form series of unique but related works.
If you're coming from Processing, p5.js, or similar tools, the concepts will feel familiar — noise, particles, flow fields — but in Eido they're all data in, data out. No draw loop, no mutable state. You describe what you want, and Eido produces it.
Layouts: Grids, Lines & Circles
Before diving into algorithms, you'll want ways to arrange shapes in patterns. These layout helpers take a rule (a function) and apply it at every position in a grid, along a line, or around a circle:
Grid
Place something at every cell in a grid. Your function receives the column and row numbers — use them to vary size, color, or anything else:
(scene/grid 10 10
  (fn [col row]
    {:node/type :shape/circle
     :circle/center [(+ 30 (* col 40)) (+ 30 (* row 40))]
     :circle/radius 15
     :style/fill [:color/rgb (* col 25) (* row 25) 128]}))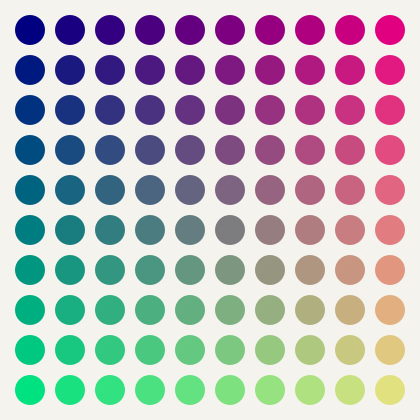
Distribute along a line
Spread shapes evenly between two points. The t parameter goes from 0 at the start to 1 at the end — use it for gradual size or color changes:
(scene/distribute 8 [50 200] [750 200]
  (fn [x y t]   ;; t is progress 0 to 1
    {:node/type :shape/circle
     :circle/center [x y]
     :circle/radius (+ 5 (* 20 t))
     :style/fill [:color/rgb 0 0 0]}))
Radial arrangement
Arrange shapes in a circle — like numbers on a clock face:
(scene/radial 12 [200 200] 120  ;; 12 items around [200,200] radius 120
  (fn [x y angle]
    {:node/type :shape/circle
     :circle/center [x y]
     :circle/radius 15
     :style/fill [:color/rgb 200 0 0]}))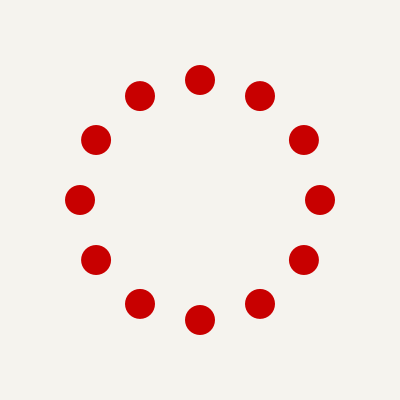
Contour Lines
Contour lines connect points of equal value — like elevation lines on a topographic map. Think of it as slicing through a noise landscape at different heights and tracing where each slice hits. The result is those organic, flowing lines you see in terrain maps and generative posters:
(require '[eido.gen.contour :as contour])

{:node/type :contour
 :contour/bounds [0 0 500 400]
 :contour/opts {:thresholds [0.0 0.2 0.4]  ;; which "heights" to trace
                :resolution 3               ;; detail level
                :noise-scale 0.012          ;; smaller = smoother hills
                :seed 42}                   ;; change for a new landscape
 :style/stroke {:color [:color/rgb 100 150 100] :width 1}}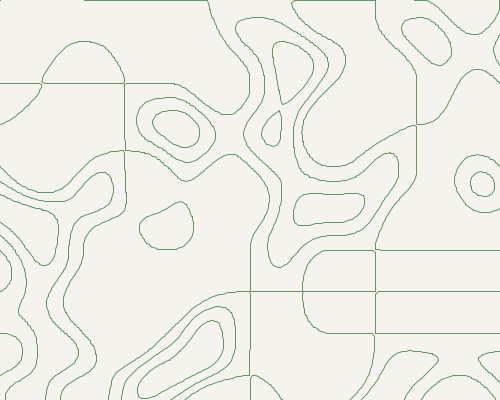
Noise
Noise is the secret ingredient behind organic-looking generative art. Unlike plain random numbers (which look like TV static), noise produces smooth randomness — nearby points get similar values, creating natural-looking gradients, hills, and flows:
(require '[eido.gen.noise :as noise])

;; Smooth 2D noise: feed in a position, get a value from -1 to 1
(noise/perlin2d x y)

;; 3D noise: use the third dimension as time for animated effects
(noise/perlin3d x y z)

;; Fractal noise: layer multiple scales for richer detail
(noise/fbm noise/perlin2d x y
  {:octaves 4 :seed 42})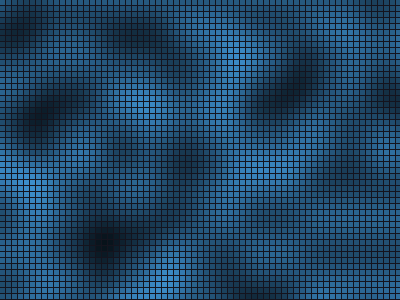
The :seed controls which particular landscape you get. Same seed, same landscape. The :octaves parameter in fbm adds layers of detail — like zooming into a coastline where you see detail at every scale.
Simplex noise
OpenSimplex2 has fewer directional artifacts than Perlin — smoother, more organic patterns. Same API, drop-in replacement:
(noise/simplex2d x y)                  ;; 2D simplex noise
(noise/simplex3d x y z)                ;; 3D simplex noise
(noise/simplex2d x y {:seed 42})       ;; seeded

;; Works with all fractal variants:
(noise/fbm noise/simplex2d x y {:octaves 6})
(noise/turbulence noise/simplex2d x y {:octaves 4})
4D noise and seamless loops
4D noise is essential for seamlessly looping animated noise. Use the 3rd and 4th dimensions as a circular time parameter:
;; 4D Perlin and simplex noise:
(noise/perlin4d x y z w)
(noise/simplex4d x y z w {:seed 42})

;; Seamless loop trick — walk a circle in the z/w plane:
(let [r 1.0
      t (/ frame total-frames)]
  (noise/simplex4d x y
    (* r (Math/cos (* t 2 Math/PI)))
    (* r (Math/sin (* t 2 Math/PI)))))
The loop radius r controls how different each frame is from its neighbors — smaller = smoother transitions, larger = more variation.
Noise preview
Tweak noise parameters and see the result instantly at the REPL:
;; Preview any noise function as a grayscale image:
(show (noise/preview noise/perlin2d))

;; Preview FBM with custom parameters:
(show (noise/preview
  (fn [x y] (noise/fbm noise/perlin2d x y {:octaves 6 :seed 42}))
  {:width 512 :height 512 :scale 0.01}))
Particles
Particle systems simulate many small objects — sparks, snowflakes, smoke, confetti — moving under physics forces. You describe the behavior (where particles spawn, how long they live, what forces act on them) and Eido simulates the result. Same seed, same simulation, every time.
(require '[eido.gen.particle :as particle])

;; Pre-compute 60 frames of fire particles
(let [frames (vec (particle/simulate
                    (particle/with-position particle/fire [200 350])
                    60 {:fps 30}))]
  ;; Each frame is a vector of shape nodes — compose freely
  (eido/render
    (anim/frames 60
      (fn [t]
        {:image/size [400 400]
         :image/background [:color/rgb 20 15 10]
         :image/nodes (nth frames (int (* t 59)))}))
    {:output "fire.gif" :fps 30}))
Built-in presets: particle/fire, particle/snow, particle/sparks, particle/confetti, particle/smoke, particle/fountain. Start from a preset and tweak it — change gravity, lifetime, colors — using assoc and update.
Controlling Randomness
Plain randomness gives you chaos. Shaped randomness gives you art. Instead of "pick any number," you can say things like "pick a size, but most should be small with occasional large ones" or "choose a color, but make red rare." That's what this module is for.
The key idea: every function takes a seed — a number that locks the result. Same seed, same output, always. Change the seed and you get a fresh variation. This is how you explore, then freeze a result you like.
Spread evenly vs. cluster naturally
uniform scatters values evenly across a range (top row). gaussian clusters them around a center with natural falloff (bottom row) — the "bell curve" shape you see everywhere in nature:
(require '[eido.gen.prob :as prob])

;; Top: 80 dots spread evenly between 20 and 380
(prob/uniform 80 20.0 380.0 42)

;; Bottom: 80 dots clustered around 200 (mean=200, sd=50)
(prob/gaussian 80 200.0 50.0 99)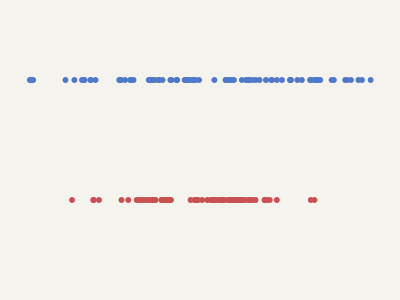
Weighted choice — controlling frequency
This is how you control what appears most often. Give each option a weight — higher weight means more likely. Here, circles appear 6x more often than triangles:
;; 60% circles (blue), 30% squares (gold), 10% triangles (red)
(prob/pick-weighted [:circle :square :triangle]
                    [6 3 1] seed)
Try changing the weights to see how the balance shifts. Weights of [1 1 1] give equal frequency; [10 1 1] makes the first option dominant.
Coin flips and shuffling
;; Should this element be fancy? 30% chance
(prob/coin 0.3 seed)

;; Shuffle a list in a repeatable way
(prob/shuffle-seeded [1 2 3 4 5] seed)
These tools feed naturally into palette sampling, series parameters, and per-item variation — giving you precise artistic control over what would otherwise be pure chance.
Shaped distributions
Beyond uniform and Gaussian, three more distribution shapes for sculpting randomness:
;; Pareto (heavy-tailed): most values small, occasional giants
;; Great for natural size variation (city sizes, star brightness)
(prob/pareto 50 2.0 1.0 seed)  ;; 50 values, alpha=2, min=1

;; Triangular: bounded bell curve with explicit min/max/peak
;; "Mostly around 0.3 but never below 0 or above 1"
(prob/sample {:type :triangular :min 0 :max 1 :mode 0.3} seed)

;; Eased: shape any distribution with an easing curve
;; Pass any (fn [t] -> t) to skew the output
(require '[eido.animate :as anim])
(prob/sample {:type :eased :easing anim/ease-in :lo 5 :hi 50} seed)
Geometric sampling
Sample points on or inside circles and spheres — useful for scatter patterns, particle emission, and radial layouts:
;; Single point on a circle's circumference
(prob/on-circle 100.0 seed)  ;; => [x y]

;; 50 points uniformly inside a disc (no center clustering)
(prob/scatter-in-circle 50 100.0 [200 200] seed)

;; Point on a sphere surface (3D — uniform, no polar clustering)
(prob/on-sphere 10.0 seed)  ;; => [x y z]

;; Point uniformly inside a sphere volume
(prob/in-sphere 10.0 [0 0 0] seed)  ;; => [x y z]

;; n points on a circle (e.g. for radial layouts)
(prob/scatter-on-circle 12 100.0 [200 200] seed)
Jittering point positions
Displace any set of points by a Gaussian offset — turns a regular grid into something organic:
(require '[eido.gen.scatter :as scatter])

;; Break the regularity of a grid
(scatter/jitter (scatter/grid [0 0 400 400] 10 10) {:amount 3.0 :seed seed})
Circle Packing
Fill a region with circles of varying sizes, packed tightly without overlapping — like bubbles in a glass or cells under a microscope. It's one of the most visually striking generative techniques and appears constantly in contemporary generative art.
(require '[eido.gen.circle :as circle])

;; Pack circles into a region, color them with a weighted palette
(let [circles (circle/circle-pack [0 0 400 400]
                {:min-radius  3       ;; smallest circle
                 :max-radius  35      ;; largest circle
                 :padding     2       ;; gap between circles
                 :max-circles 200     ;; stop after this many
                 :seed        42})    ;; change for a new arrangement
      colors (palette/weighted-sample
               (:sunset palette/palettes)
               [3 2 2 1 5] (count circles) 42)]
  ;; Draw each circle with its sampled color
  ...)
Tweak :min-radius and :max-radius to control the size range. Lower :padding for tighter packing. Increase :max-circles to fill more space.
Packing into shapes
Pack circles inside any closed shape — stars, text outlines, hand-drawn blobs:
;; Pack circles inside a star — each one a different hue
(circle/circle-pack-in-path
  (:path/commands (scene/star [200 200] 180 70 5))
  {:min-radius 2 :max-radius 15 :seed 42})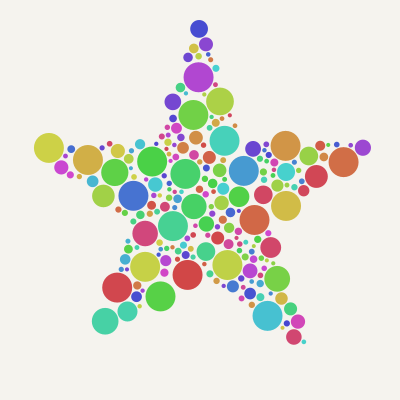
The result is always plain data — a list of positions and radii. You choose how to draw them.
Rectangular Subdivision
Start with one big rectangle and split it again and again into smaller cells — like a Mondrian painting, a newspaper layout, or an abstract quilt. Each split chooses a random direction and position, creating organic-looking grids that feel structured but not mechanical.
(require '[eido.gen.subdivide :as sub])

(sub/subdivide [0 0 400 400]
  {:depth       4          ;; how many times to split
   :min-size    35         ;; don't make cells smaller than this
   :split-range [0.3 0.7]  ;; how uneven splits can be
   :padding     5          ;; gap between cells
   :seed        77})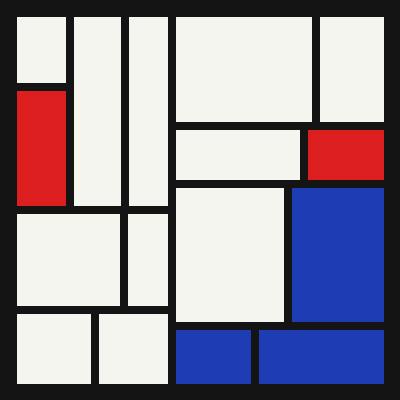
Increase :depth for finer divisions. Widen :split-range (e.g. [0.15 0.85]) for more dramatic size differences. Set :h-bias to 0.0 for only vertical splits or 1.0 for only horizontal.
Each cell knows its :depth — use that to vary color, texture, or content. The real power comes from filling each cell with something different: a circle pack in one, a flow field in another, a flat color in a third.
Weighted Palettes
Real generative art uses color with intention — 60% neutral, 30% primary, 10% accent. Weighted palettes give you explicit control over how often each color appears:
(require '[eido.color.palette :as palette])

;; Sample 100 colors from a palette with weights
;; Neutral dominates, accent is rare
(palette/weighted-sample
  [[:color/rgb 240 235 225]    ;; neutral  — weight 5
   [:color/rgb 200 50 50]      ;; primary  — weight 2
   [:color/rgb 50 120 200]     ;; secondary — weight 2
   [:color/rgb 255 200 0]]     ;; accent   — weight 1
  [5 2 2 1]
  100 seed)
The bar chart above shows the sampled colors in order — notice how the neutral cream dominates, while the gold accent appears sparingly. Change the weights to shift the balance.
weighted-gradient creates gradient stops where each color occupies proportional space — feed into gradient-map for smooth interpolation. shuffle-palette randomizes color order with a seed — great for giving each edition a different arrangement from the same palette.
Palette adjustments
Shift an entire palette's mood in one call:
;; Make a palette warmer (shift hues toward orange)
(palette/warmer my-palette 10)

;; Multiple adjustments at once:
(palette/adjust my-palette {:darker 0.1 :muted 0.2})

;; All available: warmer, cooler, muted, vivid, darker, lighter
Non-linear gradients
Apply easing functions to gradient interpolation for more natural transitions:
(require '[eido.animate :as anim])

;; Linear gradient (default):
(palette/gradient-map stops 0.5)

;; Ease-in: slow start, fast end
(palette/gradient-map stops 0.5 {:easing anim/ease-in})
Palette preview
See a palette instantly at the REPL without building a scene:
;; Preview any palette as a color swatch:
(show (palette/swatch [:red :coral :gold :teal :navy]))

;; Custom dimensions:
(show (palette/swatch my-palette {:width 600 :height 80}))
Path Aesthetics
Three helpers that transform any path into something that looks more organic, hand-drawn, or stylized. They work on path commands and return path commands, so you can chain them freely.
Smoothing
Turn angular polylines (gray) into flowing curves (red). The :samples option controls how many points to fit — more points means a tighter fit:
(require '[eido.path.aesthetic :as aesthetic])

(aesthetic/smooth-commands path-cmds {:samples 40})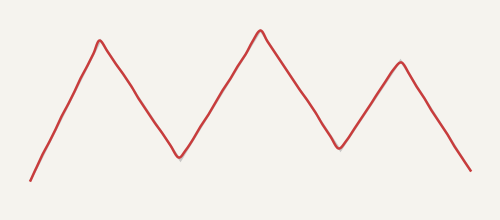
Jitter — hand-drawn wobble
Add organic irregularity to any path. Control the intensity with :amount — subtle (blue, amount 4) vs. dramatic (red, amount 12):
(aesthetic/jittered-commands path-cmds
  {:amount 4.0   ;; displacement intensity
   :seed 42})    ;; change seed for different wobble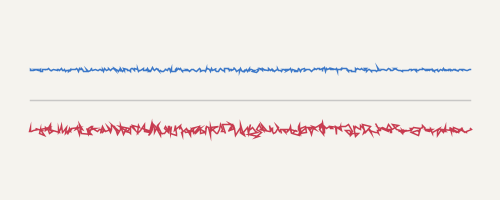
Dashing
Break a continuous path into dash segments. Three different dash patterns on the same line:
;; Top: 15px on, 8px off
(aesthetic/dash-commands path-cmds {:dash [15.0 8.0]})

;; Middle: long dashes
(aesthetic/dash-commands path-cmds {:dash [30.0 5.0]})

;; Bottom: dots
(aesthetic/dash-commands path-cmds {:dash [5.0 15.0]})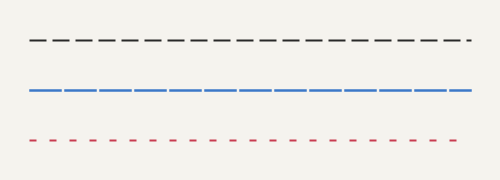
Flow field collision detection
By default, flow field streamlines can cross and overlap. Add :collision-distance to enforce minimum spacing — the result is gallery-ready even density:
(flow/flow-field [0 0 500 400]
  {:density 15 :steps 50 :seed 42
   :collision-distance 8.0})  ;; streamlines stop when approaching others
Combining them — dashed flow field
The real power is chaining: smooth a flow field, then dash it. Each streamline becomes a series of short, flowing strokes:
(let [paths (flow/flow-field [20 20 460 360]
                {:density 30 :steps 35 :seed 42})]
  (mapcat (fn [path]
            (-> (:path/commands path)
                (aesthetic/smooth-commands {:samples 30})
                (aesthetic/dash-commands {:dash [10.0 6.0]})))
          paths))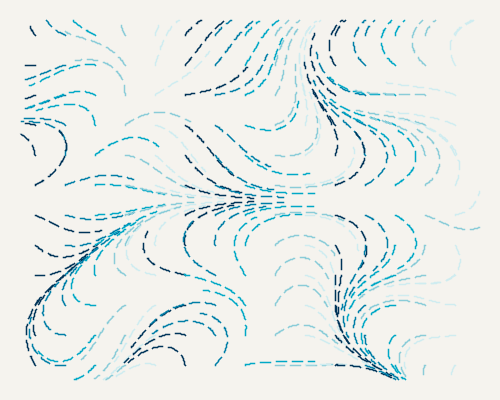
Try different :dash ratios, :density values, and :seeds to find the feel you want.
Media presets
Named preset pipelines for common physical media aesthetics — inspect, modify, or combine them:
;; Ink strokes: moderate smoothing + organic jitter
(aesthetic/stylize path-cmds (aesthetic/ink-preset seed))

;; Pencil lines: light smoothing + fine jitter + sketch dashes
(aesthetic/stylize path-cmds (aesthetic/pencil-preset seed))

;; Watercolor edges: heavy smoothing + pronounced bleeding
(aesthetic/stylize path-cmds (aesthetic/watercolor-preset seed))

;; Presets are just data — inspect and modify:
(aesthetic/ink-preset 42)
;; => [{:op :chaikin, :iterations 2}
;;     {:op :jitter, :amount 1.2, :density 1.5, :seed 42}]
Chaikin smoothing
Chaikin corner-cutting produces rounder, more uniform curves than Catmull-Rom — a different aesthetic feel:
;; Chaikin smoothing (iterative corner-cutting)
(aesthetic/chaikin-commands path-cmds {:iterations 3})

;; Via stylize pipeline:
(aesthetic/stylize cmds [{:op :chaikin :iterations 3}
                          {:op :dash :dash [10 5]}])
Path simplification
Reduce point count while preserving shape — useful for cleaning up noisy paths and trimming generated geometry:
(require '[eido.path :as path])

;; Douglas-Peucker on raw points (epsilon controls aggressiveness):
(path/simplify [[0 0] [10 1] [20 0] [30 1] [40 0]] 2.0)

;; On path commands:
(path/simplify-commands cmds 2.0)
Point-in-polygon
Test whether a point falls inside a polygon — useful for constraining scatter, clipping, and spatial queries:
;; Is the point inside this irregular shape?
(path/contains-point? [[0 0] [100 0] [80 100] [20 80]] [50 50])
;; => true
Polygon inset
Shrink a polygon inward — useful for margin control and nested compositions:
;; Shrink a square by 10 pixels on all sides:
(path/inset [[0 0] [100 0] [100 100] [0 100]] 10.0)
;; => [[10 10] [90 10] [90 90] [10 90]]
Works correctly for convex polygons. Concave polygons may produce self-intersecting results.
Curve splitting
Divide a path into equal-length segments — useful for dashed effects and per-segment styling:
;; Split a path into segments of ~25px arc-length:
(path/split-at-length path-cmds 25.0)
;; => [[[:move-to [0 0]] [:line-to [25 0]]]
;;     [[:move-to [25 0]] [:line-to [50 0]]] ...]
Path interpolation
Blend between two matching paths at parameter t:
;; Morph between two shapes (must have same command count):
(path/interpolate path-a path-b 0.5)  ;; midpoint between A and B
Clipping to bounds
Clip a path to a bounding rectangle — useful for constraining generated paths:
;; Clip to a 100x100 rectangle:
(path/trim-to-bounds path-cmds [0 0 100 100])
;; => vector of clipped path-command vectors
Long-Form Series
For Art Blocks / fxhash-style workflows: one algorithm, many outputs, each keyed by an edition number. You define a parameter spec — which values vary and how — and the series module generates independent, deterministic parameters for each edition:
(require '[eido.gen.series :as series])

;; Define what varies across editions
(def spec
  {:hue {:type :uniform :lo 0 :hi 360}
   :r   {:type :gaussian :mean 20 :sd 8}})

;; Generate parameters for editions 0-8
(series/series-range spec master-seed 0 9)
;; Each edition gets different hue and radius values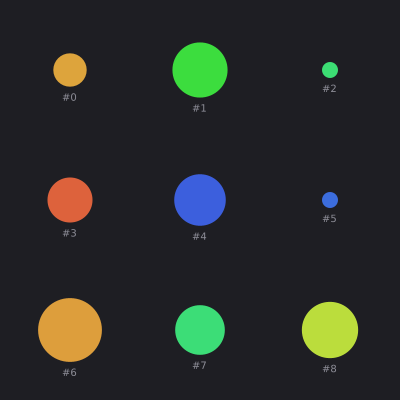
The grid above shows 9 editions from the same spec — each with a unique hue and size, all derived deterministically from the master seed. Edition 41 and edition 42 are completely uncorrelated despite being neighbors.
Available parameter types: :uniform (even spread), :gaussian (clustered), :choice (pick from a list), :weighted-choice (pick with weights), and :boolean (coin flip with probability).
Trait distribution analysis
Before releasing a series, verify that your trait distribution is what you intended:
(series/trait-summary spec 42 1000
  {:density [[30 "sparse"] [70 "medium"] [100 "dense"]]
   :speed   [[5 "slow"] [10 "fast"]]})
;; => {:density {"sparse" 312, "medium" 398, "dense" 290}
;;     :speed   {"slow" 487, "fast" 513}}
Focused exploration
After a broad sweep, compare favorites side by side:
;; Render specific editions you liked:
(show (series/seed-grid
  {:spec spec :master-seed 42
   :seeds [12 47 103 256 891]
   :scene-fn make-scene :cols 5}))
Start wide with :start/:end, find interesting editions, then use :seeds to narrow down.
Parameter sweeps
Isolate a single parameter to see its effect across a range of values:
;; Sweep density across rows, color-count across columns
(show (series/param-grid
  {:base-params {:density 0.5 :color-count 3 :seed 42}
   :row-param   {:key :density :values [0.2 0.5 0.8]}
   :col-param   {:key :color-count :values [2 3 5]}
   :scene-fn    (fn [params] (make-scene params))
   :thumb-size  [160 160]}))
param-grid is the complement to seed-grid: where seed-grid varies randomness, param-grid varies design decisions.
Cellular Automata & Reaction-Diffusion
Some of the most mesmerizing organic patterns come from simple rules applied to a grid, over and over. Cells interact with their neighbors, and complex behavior emerges — coral-like growth, dividing cells, rippling waves.
Cellular Automata
The classic Game of Life — and any custom rule set. Start with a random grid, run it forward, and render the result. Each generation, cells are born or die based on how many living neighbors they have:
(require '[eido.gen.ca :as ca])

(let [grid    (ca/ca-grid 50 50 :random 42)    ;; random starting state
      evolved (ca/ca-run grid :life 50)]        ;; run 50 generations
  (ca/ca->nodes evolved 10                      ;; 10px per cell
    {:style/fill [:color/rgb 30 30 30]}))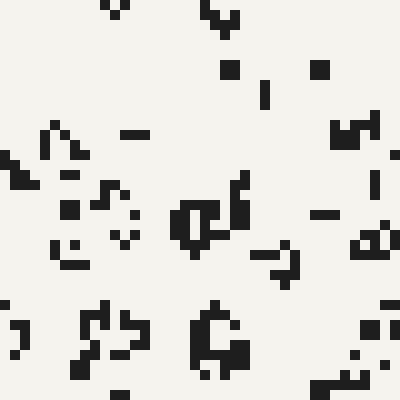
Try :highlife for a different flavor, or define your own rules with {:birth #{3 6} :survive #{2 3}} — specify exactly how many neighbors cause birth or survival.
Reaction-Diffusion
Two invisible chemicals spread across a surface and react with each other, creating organic spots, stripes, and coral-like growth. This is the math behind animal skin patterns and mineral formations. Eido includes named presets so you can jump right in:
;; Grow coral-like patterns from a center seed
(let [grid   (ca/rd-grid 80 80 :center 42)
      result (ca/rd-run grid (:coral ca/rd-presets) 400)]
  (ca/rd->nodes result 5
    (fn [a b]  ;; a and b are the two chemical concentrations
      [:color/rgb
       (int (+ 10 (* 80 (min 1.0 (* b 4)))))
       (int (+ 20 (* 120 (min 1.0 (* b 4)))))
       (int (+ 40 (* 180 (- 1.0 (* a 0.3)))))])))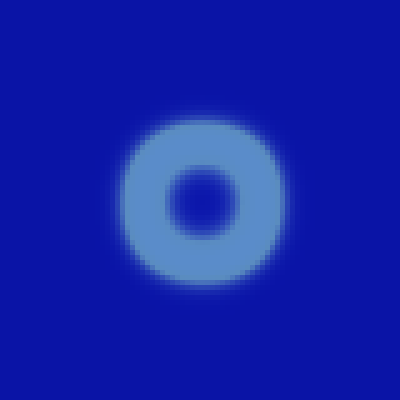
Presets: :coral (branching growth), :mitosis (dividing cells), :waves (rippling patterns), :spots (leopard-like dots). For animation, call rd-step once per frame.
Boids & Flocking
Ever watched a flock of starlings twist through the sky? Each bird follows three simple rules: don't crowd your neighbors (separation), fly the same direction as them (alignment), and stay close to the group (cohesion). From these three rules, beautiful swirling patterns emerge — no leader, no choreography.
(require '[eido.gen.boids :as boids])

;; Create and simulate a flock
(let [frames (boids/simulate-flock boids/classic 80 {})]
  ;; Render each frame as oriented triangles
  (anim/frames (count frames)
    (fn [t]
      (let [flock (nth frames (int (* t (dec (count frames)))))]
        {:image/size [500 350]
         :image/nodes
         (boids/flock->nodes flock
           {:shape :triangle :size 7
            :style {:style/fill [:color/rgb 40 45 55]}})}))))
Presets: boids/classic (balanced, natural flocking) and boids/murmuration (tight starling-like swarming). Add optional behaviors like :seek (steer toward a point), :flee (steer away), or :wander (noise-based drifting) by adding them to the config.
Animation
Animation in Eido is just a sequence of scenes — one per frame. There's no timeline, no keyframe system, no mutable state. You write a function that turns a progress value into a scene, and Eido calls it once per frame to produce a GIF or video.
Creating Animations
An animation in Eido is just a sequence of scenes — one per frame. There's no timeline, no keyframe system, no mutable state. You write a function that takes a progress value t (from 0 to 1) and returns a scene. Eido calls it once per frame:
(require '[eido.animate :as anim])

(def frames
  (anim/frames 40    ;; 40 frames total
    (fn [t]          ;; t goes from 0.0 to 1.0
      {:image/size [250 250]
       :image/background [:color/rgb 30 30 40]
       :image/nodes
       [{:node/type :shape/circle
         :circle/center [125 125]
         :circle/radius (* 90 t)    ;; grows over time
         :style/fill [:color/hsl (* 360 t) 0.8 0.5]}]})))

;; Render as animated GIF
(eido/render frames {:output "grow.gif" :fps 20})
Since frames are just data, you can manipulate them with all the usual tools — map, filter, concat — to build complex sequences from simple parts.
Easing & Helpers
Easing functions make motion feel natural. Instead of moving at a constant speed (gray), things can accelerate and decelerate smoothly (blue):
(anim/ease-in t)            ;; slow start, fast finish
(anim/ease-out t)           ;; fast start, slow finish
(anim/ease-in-out t)        ;; slow start and finish
(anim/ease-in-cubic t)      ;; more dramatic
(anim/ease-out-elastic t)   ;; springy overshoot
(anim/ease-out-bounce t)    ;; bouncing ball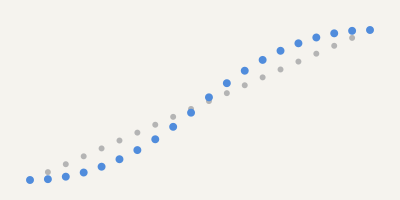
Other useful helpers:
(anim/ping-pong t)          ;; oscillate: 0→1→0
(anim/cycle-n 3 t)          ;; repeat 3 times
(anim/lerp 0 100 t)         ;; interpolate between values
(anim/stagger 2 5 t 0.3)    ;; offset timing per element
3D
3D Scenes
Eido can render 3D objects by projecting them onto 2D. You set up a camera (perspective or isometric), define lights, and place 3D meshes in the scene. The result is a regular 2D scene with shaded polygons — no GPU required:
(require '[eido.scene3d :as s3d])

(let [proj (s3d/perspective
             {:scale 120 :origin [200 200]
              :yaw 0.5 :pitch -0.3 :distance 5})
      light {:light/direction [1 1 0.5]
             :light/ambient 0.25
             :light/intensity 0.8}]
  (s3d/sphere proj [0 0 0]
    {:radius 1.5
     :style {:style/fill [:color/name "cornflowerblue"]}
     :light light
     :subdivisions 3}))  ;; higher = smoother sphere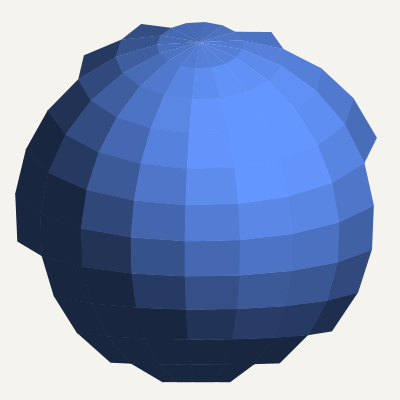
Available primitives: sphere, cube, cone, torus, cylinder. Load arbitrary meshes from OBJ files with eido.io.obj/load-obj.
Camera types
;; Perspective — objects shrink with distance
(s3d/perspective {:scale 100 :origin [200 200]
                  :yaw 0.3 :pitch -0.4 :distance 5})

;; Isometric — no perspective distortion
(s3d/isometric {:scale 40 :origin [200 200]})

;; Look-at — point camera at a target
(s3d/look-at {:eye [3 2 5] :target [0 0 0] :up [0 1 0]
              :scale 100 :origin [200 200]})
Effects & Materials
Filter Effects
A group can carry a :group/filter that post-processes everything it contains. The filter is a tagged vector — the tag names the effect, the rest are positional arguments:
;; Halftone — dot-size, angle (degrees)
{:node/type :group
 :group/filter [:halftone 6 0]
 :group/children [,,,]}

;; Grain — amount (0..1), seed
{:node/type :group :group/filter [:grain 0.12 42] :group/children [,,,]}

;; Posterize — number of levels
{:node/type :group :group/filter [:posterize 3] :group/children [,,,]}

;; Blur — radius
{:node/type :group :group/filter [:blur 8] :group/children [,,,]}

;; Duotone — shadow color, highlight color
{:node/type :group
 :group/filter [:duotone [:color/rgb 0 20 60] [:color/rgb 0 255 200]]
 :group/children [,,,]}
Filters compose with everything else a group does — children, compositing, clipping. A blurred copy behind crisp shapes makes a glow; halftone over a flat fill makes a print-screen texture; duotone maps the group to a two-color range.
3D Materials & Lighting
Beyond the flat shading shown in the 3D section, eido.ir.material adds specular highlights (Blinn-Phong) and richer light types. Materials and lights are plain data passed to s3d/render-mesh, which shades every face and returns a 2D node group:
(require '[eido.scene3d :as s3d])
(require '[eido.ir.material :as material])

(s3d/render-mesh projection mesh
  {:style {:style/fill [:color/rgb 150 100 200]
           :material (material/phong :specular 0.4 :shininess 32.0)}
   :light {:light/direction [1 2 1]
           :light/ambient 0.2 :light/intensity 0.8}})
Light types
;; Directional — parallel rays (like the sun)
(material/directional [1 2 1] :multiplier 0.8 :ambient 0.2)

;; Omni — point light radiating in all directions
(material/omni [100 50 200]
  :color [:color/rgb 255 200 150]
  :decay :inverse-square :decay-start 10.0)

;; Spot — cone with hotspot/falloff angles
(material/spot [0 200 0] [0 -1 0]
  :hotspot 25 :falloff 35 :decay :inverse)

;; Hemisphere — sky/ground ambient
(material/hemisphere
  [:color/rgb 135 180 220] [:color/rgb 40 30 20]
  :multiplier 0.3)
Multiple lights
Pass :lights (a vector) to combine lights — each light's color tints its contribution:
(s3d/render-mesh proj mesh
  {:style {:style/fill [:color/rgb 200 200 200]
           :material (material/phong :specular 0.5)}
   :lights [(material/omni [3 2 2]
              :color [:color/rgb 255 180 100]
              :multiplier 1.5 :decay :inverse)
            (material/hemisphere
              [:color/rgb 40 50 80] [:color/rgb 15 10 5]
              :multiplier 0.2)]})
Recipes
Long-Form Edition
The canonical workflow for seed-driven generative art (Art Blocks / fxhash style). One algorithm, many unique outputs.
(require '[eido.gen.series :as series])
(require '[eido.core :as eido])

;; 1. Define what varies across editions
(def spec
  {:hue      {:type :uniform :lo 0.0 :hi 360.0}
   :density  {:type :gaussian :mean 20.0 :sd 5.0}
   :palette  {:type :choice :options [:sunset :ocean :forest]}
   :bold?    {:type :boolean :probability 0.3}})

;; 2. Build a scene from sampled parameters
(defn make-scene [params]
  {:image/size [800 800]
   :image/background [:color/hsl (:hue params) 0.15 0.95]
   :image/nodes
   [{:node/type     :shape/circle
     :circle/center [400 400]
     :circle/radius (* 300 (/ (:density params) 40.0))
     :style/fill    [:color/hsl (:hue params) 0.7 0.5]}]})

;; 3. Render a batch — one deterministic param map per edition
(doseq [[edition params]
        (map-indexed vector (series/series-range spec 42 0 50))]
  (eido/render (make-scene params)
               {:output (str "editions/edition-" edition ".png")}))
series-range gives each edition a deterministic, uncorrelated seed, so the same master-seed and edition number always produce the same parameters — and therefore the same image.
Watercolor / Ink Wash
Simulate translucent media by layering many low-opacity, slightly deformed copies of a shape. The overlapping layers create organic depth.
(require '[eido.texture :as texture])

;; Quick watercolor effect on a shape:
(texture/watercolor my-polygon
  {:layers 30 :opacity 0.04 :amount 3.0 :seed 42})

;; Full control with custom deformation:
(texture/layered my-polygon
  {:layers 40 :opacity 0.03 :seed 42
   :deform-fn (fn [node _layer-index seed]
                (update node :path/commands
                  distort/distort-commands {:type :jitter :amount 4 :seed seed}))})
Each layer is independently deformed, creating the characteristic uneven edge of physical watercolor. 30-50 layers works well for interactive use; up to 100 for final renders.
Paper Grain / Texture
Simulate the texture of physical media (watercolor paper, canvas) by wrapping your artwork in a group with a :grain filter:
;; Paper grain overlay — applies to everything in the group:
{:image/size [600 400]
 :image/background [:color/rgb 245 240 230]
 :image/nodes
 [{:node/type :group
   :group/filter [:grain 0.12 42]   ;; amount (0..1), seed
   :group/children
   [;; Your artwork goes here
    ,,,your nodes,,,]}]}
The grain filter adds film-grain noise across the whole group. Combine it with a :group/composite mode (:overlay, :multiply) on a nested group to blend a texture layer over the artwork underneath.
Subdivide → Pack → Stylize
A recipe for geometric abstraction: subdivide the canvas, pack circles into cells, assign colors by depth.
(require '[eido.gen.subdivide :as subdivide])
(require '[eido.gen.circle :as circle])
(require '[eido.color.palette :as palette])

;; 1. Subdivide canvas into cells
(let [cells (subdivide/subdivide
              {:x 0 :y 0 :w 800 :h 800}
              {:max-depth 4 :min-size 80 :seed 42})
      pal   (:sunset palette/palettes)]
  ;; 2. Pack circles into each cell
  (->> cells
       (mapcat (fn [{:keys [x y w h depth]}]
                 (let [circles (circle/circle-pack
                                 {:x x :y y :w w :h h}
                                 {:min-r 3 :max-r (/ (min w h) 4)
                                  :max-attempts 500 :seed (hash [x y])})]
                   ;; 3. Style by subdivision depth
                   (map (fn [c]
                          {:node/type     :shape/circle
                           :circle/center [(:x c) (:y c)]
                           :circle/radius (:r c)
                           :style/fill    (nth pal (mod depth (count pal)))
                           :style/stroke  {:color :black :width 0.5}})
                        circles))))
       vec))
This pattern composes three modules (subdivide, circle, palette) into a single visual method. Swap the subdivision for noise-driven regions, or replace circles with hatched rectangles — the structure stays the same.
Flow Field → Path → Texture
Organic line work from noise fields: trace streamlines, smooth them, add texture.
(require '[eido.gen.noise :as noise])
(require '[eido.gen.flow :as flow])
(require '[eido.path.aesthetic :as aes])

;; 1. Build a flow field from noise
(let [field (flow/flow-field
              {:bounds [0 0 800 800]
               :resolution 20
               :noise-fn (fn [x y] (noise/fbm x y {:octaves 4 :scale 0.003}))})
      ;; 2. Trace streamlines
      paths (:paths field)]
  ;; 3. Smooth and jitter each path
  (->> paths
       (map (fn [path-cmds]
              {:node/type     :shape/path
               :path/commands (-> path-cmds
                                  (aes/smooth-commands {:tension 0.4})
                                  (aes/jittered-commands {:amount 1.5 :seed 42}))
               :style/stroke  {:color :black :width 0.8}}))
       vec))
Streamlines make clean, single-weight line work — smoothing settles the curve, a touch of jitter keeps it from looking mechanical.
CA / Reaction-Diffusion → Contour → Palette
Field-driven biological abstraction: simulate, extract contours, map to color.
(require '[eido.gen.ca :as ca])
(require '[eido.gen.contour :as contour])
(require '[eido.color.palette :as palette])

;; 1. Run Gray-Scott reaction-diffusion
(let [grid    (ca/rd-grid 200 200)
      result  (ca/rd-run grid 3000 {:preset :coral})
      ;; 2. Extract concentration field as a scalar function
      field-fn (fn [x y]
                 (let [col (int (/ (* x 200) 800))
                       row (int (/ (* y 200) 800))]
                   (aget ^doubles (nth (:v result) (min row 199))
                         (min col 199))))
      ;; 3. Contour at threshold levels
      pal     (:ocean palette/palettes)
      levels  [0.1 0.2 0.3 0.4 0.5]]
  (->> levels
       (map-indexed
         (fn [i level]
           (let [contours (contour/contour-lines
                            {:bounds [0 0 800 800]
                             :fn field-fn
                             :level level
                             :resolution 4})]
             {:node/type     :group
              :group/children
              (mapv (fn [path-cmds]
                      {:node/type     :shape/path
                       :path/commands path-cmds
                       :style/fill    (nth pal (mod i (count pal)))
                       :style/stroke  {:color :black :width 0.3}})
                    contours)})))
       vec))
The reaction-diffusion presets (:coral, :mitosis, :ripple, :spots) each produce distinctive field patterns. Contour extraction turns continuous fields into drawable regions.
Paint Engine
The paint engine renders brushstrokes as pixel-level dab sequences onto a raster surface — brushes are data, strokes are data. You author paint two ways: a standalone :paint/surface node with explicit stroke points, or a group of brush-painted paths sharing one :paint/surface.
Surfaces and Strokes
A :paint/surface node paints a list of strokes. Each stroke is a brush, a color, a radius, and a list of [x y] points the dab follows:
{:node/type :paint/surface
 :paint/size [600 400]
 :paint/strokes
 [{:paint/brush  :chalk
   :paint/color  [:color/rgb 80 60 40]
   :paint/radius 12.0
   :paint/points [[50 100] [300 60] [550 100]]}]}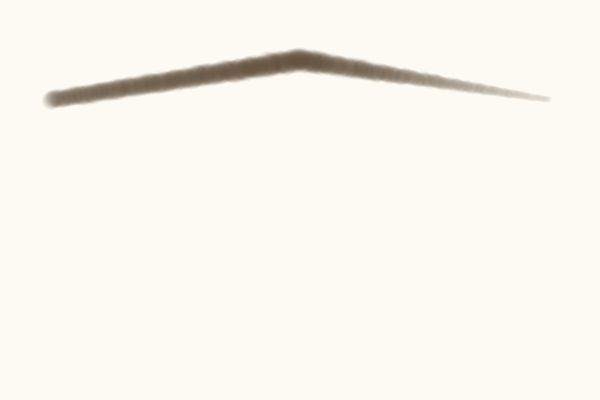
Brush presets
Six presets cover the common media:
:pencil      ;; fine, firm
:ink         ;; hard, high flow
:marker      ;; chisel tip
:watercolor  ;; soft, wide, low flow
:oil         ;; elliptical tip
:chalk       ;; soft, with grain
Or override the brush directly instead of naming a preset — set the tip shape, hardness, flow, and blend mode:
{:paint/brush {:brush/tip   {:tip/shape :ellipse :tip/hardness 0.9}
               :brush/paint {:paint/flow 0.7 :paint/blend :multiply}}}
Tip shapes: :round, :ellipse, :chisel, :rect, :line. Blend modes: :normal, :multiply, :screen, :overlay, :darken, :lighten, :add.
Painting Paths
To paint along curves instead of listing points, wrap brush-painted :shape/path nodes in a group carrying :paint/surface. Each path's commands become the stroke; give it a :paint/brush, :paint/color, and :paint/radius (and no :style/fill or :style/stroke):
{:node/type :group
 :paint/surface {:paint/size [800 400]}
 :group/children
 [{:node/type :shape/path
   :path/commands [[:move-to [20 250]]
                   [:curve-to [200 100] [400 350] [780 200]]]
   :paint/brush :watercolor
   :paint/color [:color/hsl 210 0.45 0.65]
   :paint/radius 45.0}
  {:node/type :shape/path
   :path/commands [[:move-to [120 220]]
                   [:curve-to [300 150] [500 280] [680 180]]]
   :paint/brush :ink
   :paint/color [:color/rgb 25 30 50]
   :paint/radius 2.5}]}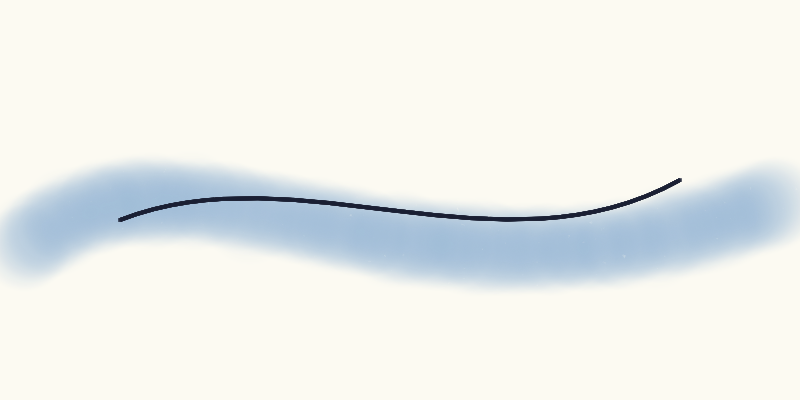
All painted children render onto the same surface, so later strokes lay over earlier ones.
Output
Export
Everything goes through one function — eido/render. A single scene renders to PNG; a sequence of frames renders to an animated GIF:
;; Static image — PNG
(eido/render scene {:output "out.png"})

;; Animation — GIF (:fps default 12)
(eido/render frames {:output "anim.gif" :fps 30})
Options
:output    ;; file path to write; omit to return the bytes
:fps       ;; frames per second for an animation (default 12)
:base-dir  ;; directory asset paths resolve against (default ".")
Called without :output, render returns a result map — :bytes (the encoded PNG/GIF), :media-type, :width, :height, and :diagnostics — so you can hand the bytes to further processing instead of writing a file.
Print-Ready Output
Artists producing physical output think in centimeters or inches, not pixels. Eido authoring provides paper-size presets and resolution-independent coordinates that you convert to pixels before rendering.
Paper size presets
(require '[eido.scene :as scene])

;; Standard paper sizes — returns a base scene map
(scene/paper :a4)
;=> {:image/size [21.0 29.7] :image/units :cm :image/dpi 300}

(scene/paper :letter :landscape true)
;=> {:image/size [11.0 8.5] :image/units :in :image/dpi 300}

(scene/paper :a3 :dpi 600)
;=> {:image/size [29.7 42.0] :image/units :cm :image/dpi 600}

;; Available sizes: :a3 :a4 :a5 :letter :legal :tabloid :square-8
Unit conversion
scene/with-units converts a scene described in real-world units to pixel coordinates. It walks the entire scene tree, scaling all spatial values (coordinates, radii, stroke widths, dash patterns, font sizes) while leaving non-spatial values (opacity, angles, colors) untouched:
;; Describe your scene in centimeters
(-> (scene/paper :a4)
    (assoc :image/background :white
           :image/nodes
           [{:node/type :shape/circle
             :circle/center [10.5 14.85]  ;; center of A4 in cm
             :circle/radius 5.0           ;; 5 cm radius
             :style/stroke {:color :black :width 0.1}}])  ;; 1mm stroke
    scene/with-units  ;; converts to pixels
    (eido/render {:output "print.png"}))
;; Output: 2480x3508 px PNG at 300 DPI
Supported units: :cm (centimeters), :mm (millimeters), :in (inches).
with-units is a pure function — it takes a data map and returns a data map. You can inspect the converted scene at the REPL before rendering.
File Workflow
Scenes can be stored as .edn files and loaded for rendering:
(eido/render (eido/read-scene "my-scene.edn") {:output "out.png"})

;; Watch a file — auto-reload the preview on every save
(watch-file "my-scene.edn")

;; Watch an atom for live coding
(def my-scene (atom {...}))
(watch-scene my-scene)

;; tap> integration — render by tapping
(install-tap!)
(tap> {:image/size [200 200] :image/nodes [...]})watch-file, watch-scene, and install-tap! are REPL helpers from dev/user.clj.
Validation
The renderer validates every scene before drawing it. A malformed scene — an unknown node type, a missing required key, an out-of-range value — makes render throw an ex-info instead of producing a broken image:
(eido/render {:image/size [800 600]
              :image/background [:color/rgb 255 255 255]
              :image/nodes [{:node/type :shape/rect}]})  ;; missing :rect/xy
;; throws ex-info; (ex-data e) =>
;;   {:status :error
;;    :diagnostics [ ,,, ]}
The diagnostics are structured data — each carries a level, an error code, a message, and the path into the scene where the problem is — so you can surface them in your own tooling, not just read a stack trace.
Stability
Functions in Eido have one of two stability levels:
- Stable (default) — the function signature and behavior are settled. Breaking changes require a major version bump and migration guidance.
- Provisional — the function works and is tested, but the API surface may change based on real-world usage. Provisional functions are marked with a badge in the API Reference.
Most of Eido's API is stable. Provisional status is reserved for newer subsystems whose configuration surface is still being refined:
eido.gen.particle— particle system configuration (emitters, forces, lifetime curves) may simplify as usage patterns emerge.eido.texture— texture and material helpers are new and may expand or restructure.
Provisional does not mean broken — it means function names, argument shapes, or option keys might change in a future release. Pin a specific Eido version in your deps.edn to avoid surprises.